Grooving a Steel Planing Form with a Router
Mike McGuire
The solution came in part from George Barnes’ book, Fly Rods Galore. He made his planing forms from high quality hardwood, hard rock maple. After drilling, tapping and setting up the adjustment bolt system, he set a tapering space between the bars of the form. He then cut the groove with a router with a 60 degree wood cutting bit set to a constant depth. The form was set up in a jig which confined the router to a straight track down the middle. The result was the desired uniformly tapered groove between the bars. The first thing to remark here is that it would be a really bad idea to try and cut such a groove in steel with a standard router bit This I did not do.
The spacing between the bars is set so that with the bit held at constant depth, the groove slopes at 0.001 inches per inch along the form. The spacing at a point is calculated thus:
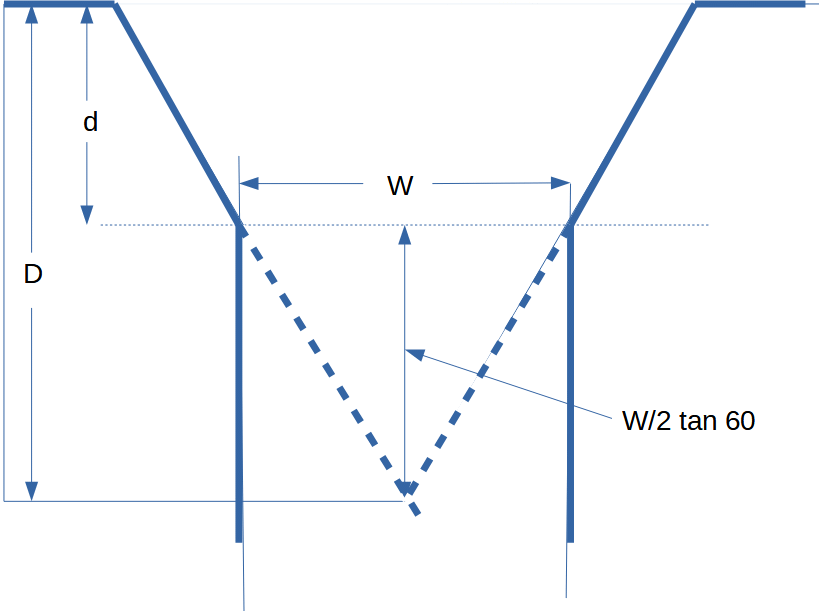
The depth of the bit is D. The depth of the form is d and the spacing w so that
D = d + (w/2) tan 60
If x is the distance from the shallowest point on form at the end where the depth is do then
d = 0.001 x + d0
then the spacing a x is
W =2 ( D - 0.001x - d0) / tan 60
In the process of updating my scallop and dam hollowing setup I had tried using a small trim router with a standard 1/4 inch wood bit. This turned out to be way too “grabby” to be controllable. Someone suggested using a carbide burr in this application. This made all the difference. It cut smoothly and cleanly with no drama. This bit I acquired from Carbide Depot. I noticed that they offered a 60 degree bit. It occurred to me that such a bit in combination with a Barnes style jig might do the job.
Here is a picture of the bit. It cost about $17 from Carbide Depot. It is 0.5" diameter
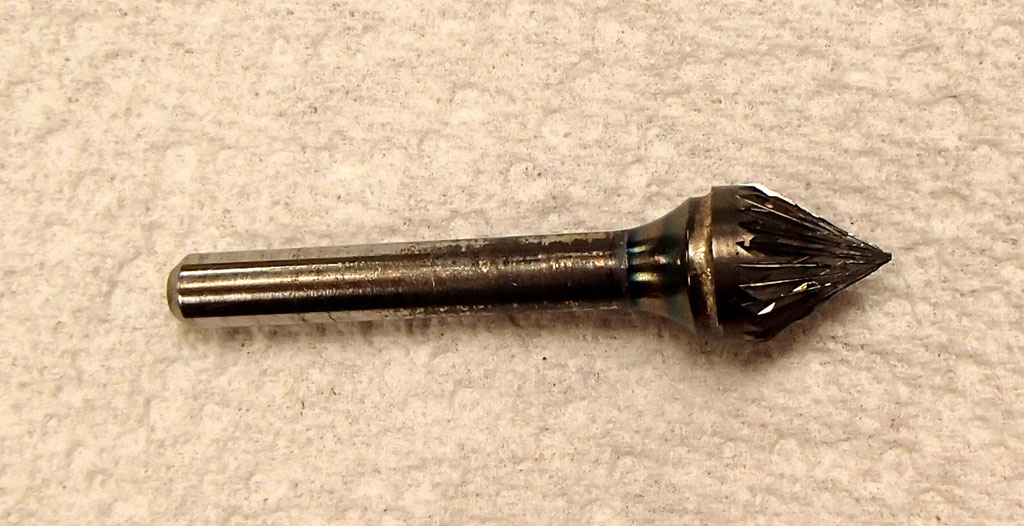
Here is a picture of the bit mounted in the router after the job was finished. The plastic baseplate got a bit scuffed in the process. It is an available replacement part, not expensive.

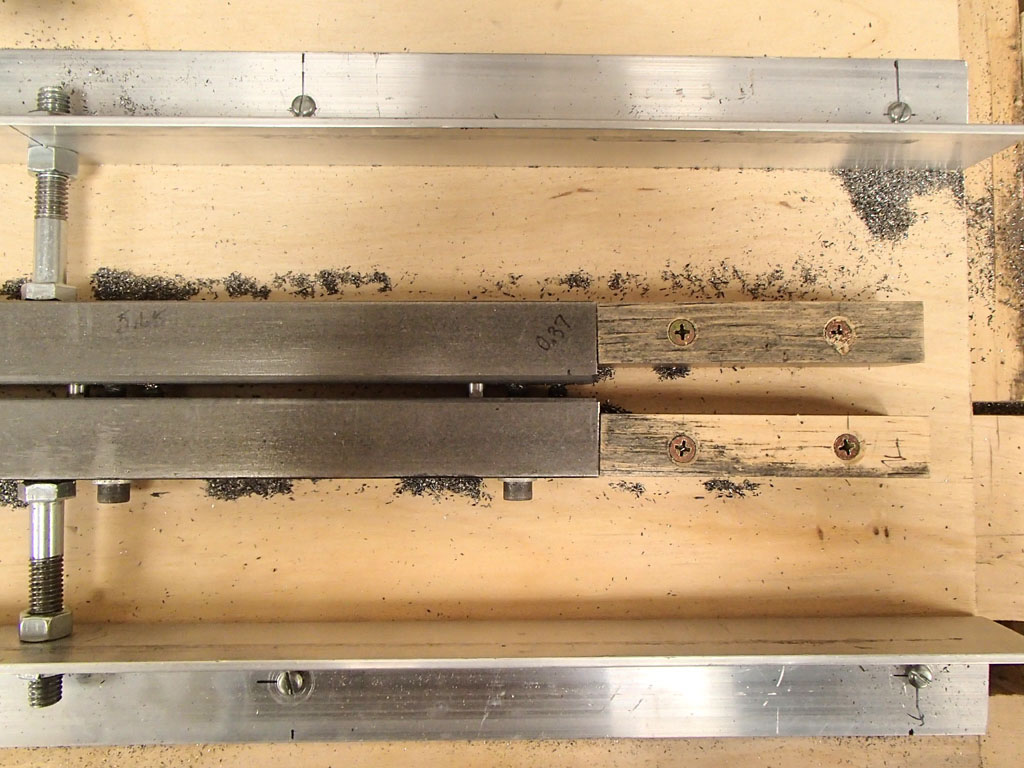
Here is general view of jig. The planing form bars were 1" by 1" square. The jig consists of two 1.25" x 1.25" aluminum angle rails spaced the diameter of the router baseplate. The rails are screwed to an 8 foot long piece of ľ inch plywood. There are opposed positioning bolts every 12 inches to center the form in the jig. One difference from Barnes' jig is that he had some blocks the thickness of the form between the rails and the form to support the router level. With 1"x1" bars of my form support was adequate.
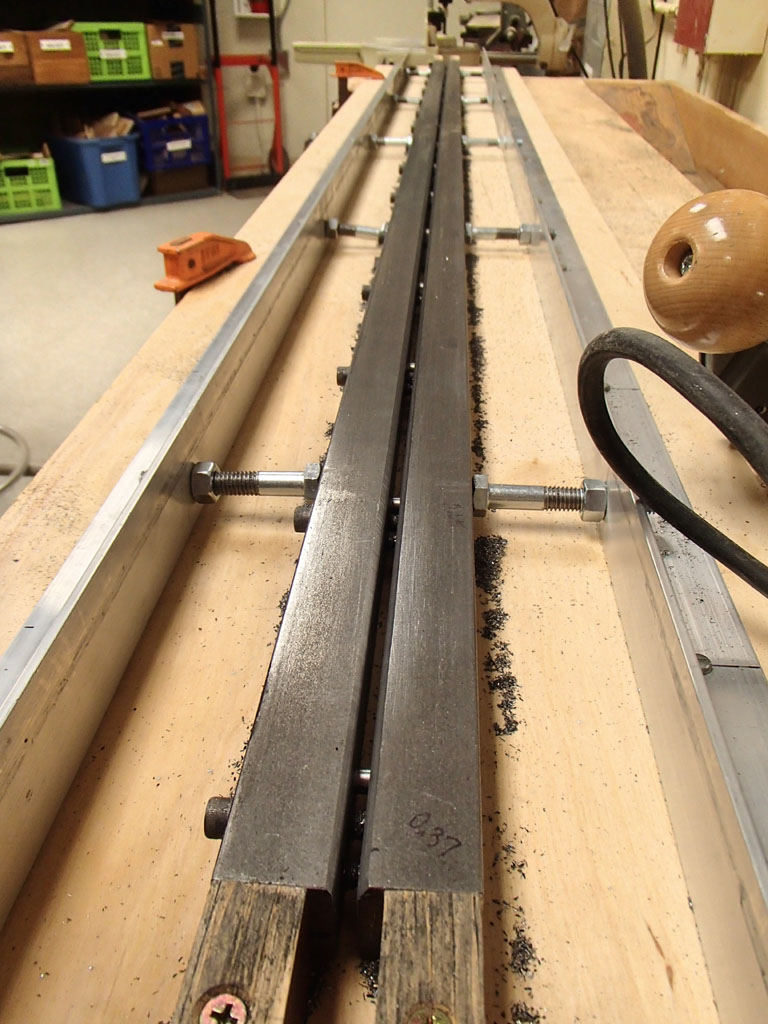
Here is a view of the starting end of the setup. There is an “onramp” here and an “offramp” at the other end to keep the router level starting and ending the cuts.
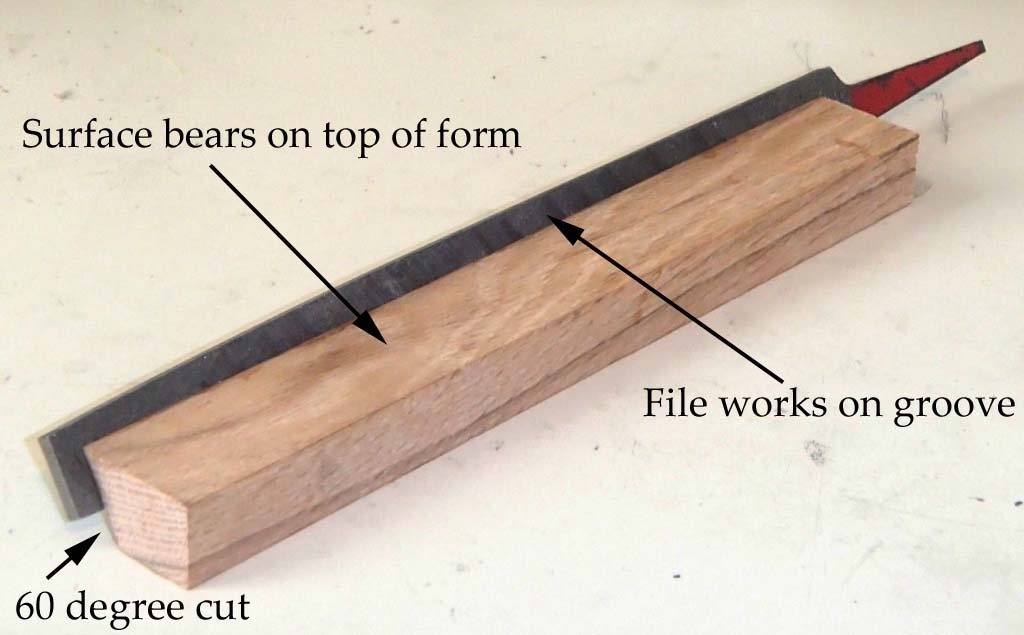
I made the cuts in several steps, extending the bit about 0.040 inches each step. On the deep side I cut to about 0.210 at the butt end to about 0.130 at the tip end. On the other side it was 0.160 at the but and 0.080 at the tip. The cutting efficiency of the bit seemed to diminish toward the end to the job. At this point the finish of the groove was not great. The bit chattered some in the process of making the cuts. I used a single cut bit, a double cut bit might have been better. The solution was some filing, but nowhere near as much as it would have taken to file the entire groove. Below is a picture of the file setup I used. It’s a mill file epoxied to piece of hardwood cut to a 60 degree angle on a table saw. I painted the surface of the groove with a felt tip marker and filed until the marker was gone.
I checked the angle with Two-Rod method. It came out 60 degrees to the accuracy I could measure it. I then made a rod with it and was quite happy with the performance.
In summary the method works quite well It is as controllable and safe as anything one might do with a router provided a carbide burr is used. Eye protection is a must and ear protection pretty desireable. It is much faster than hand filing The cost is the hardware and parts to make the jig and the bit.
I