A Ferrule Slitter
by Mike McGuire
This is a simple easy-to-make setup for slitting ferrules for bamboo fly rods. It is similar in part to one described in an article in Power Fibers for Jan. 2010 by Dennis Bertram. What's different is the method of holding the ferrule for slitting, which I think is a little simpler for someone with limited machining skills. It also owes something to some ideas that Don Schneider wrote of on the rodmakers list. Here's the big picture.
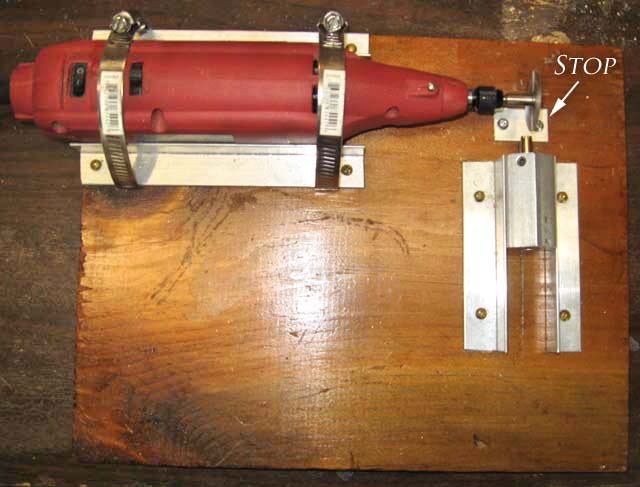
A high rpm rotary tool is held by hose clamps and 3/4" aluminum angle to the base board. The ferrule is held in a nylon collet in piece of 1" flat to flat aluminum hex stock running between aluminum angle rails. A stop limits the travel of the hex stock..
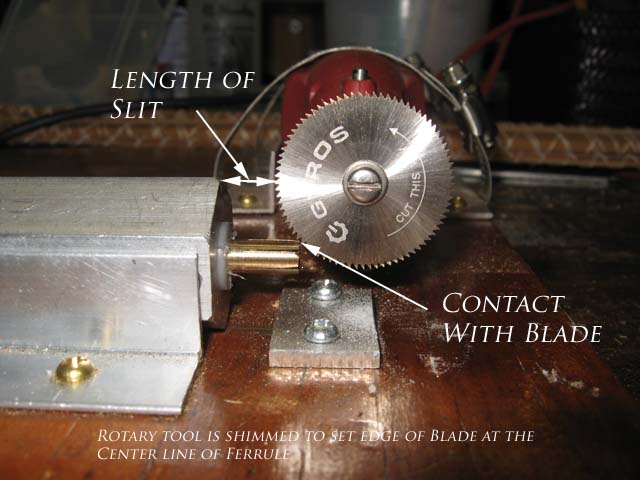
Here's another view of the setup. The blade is 0.015" thick from Gyros, obtained at a local hardware store. When the edge of the ferrule is just in contact with the blade, the length of the slit is determined as shown in the picture. Also as noted there, the rotary tool is shimmed such that the edge of the blade is no lower than the center line of the ferrule. We want to cut one slit at a time. The horizontal position of the blade is adjusted by sliding it so it's in line with the edge of the hex stock that is up.
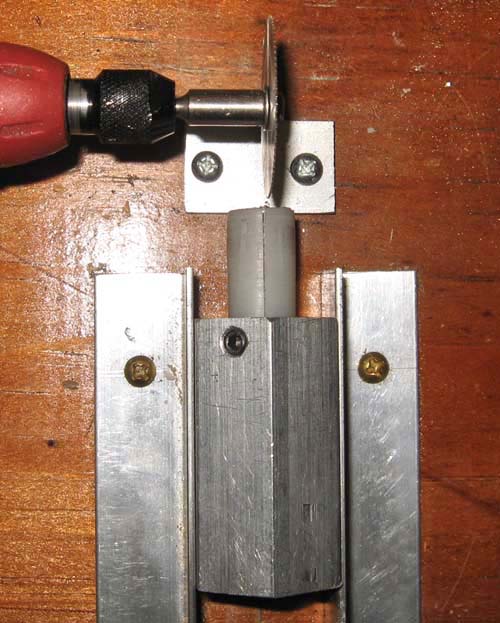
The collet is made from 0.500 nylon. The hex stock is bored to hold it. There are 10-32 set screws in holes tapped in alternate faces of the hex stock near the edge. One can be seen in the picture above. Three slits 120 degrees apart are made in the collet with the saw. The collet is made long enough so that it can be held in the hex stock while slits are cut long enough so that the collet can also be used to hold a ferrule accurately in in my 3-jaw lathe chuck without marring it. Obviously I make a collet for every size ferrule I make.
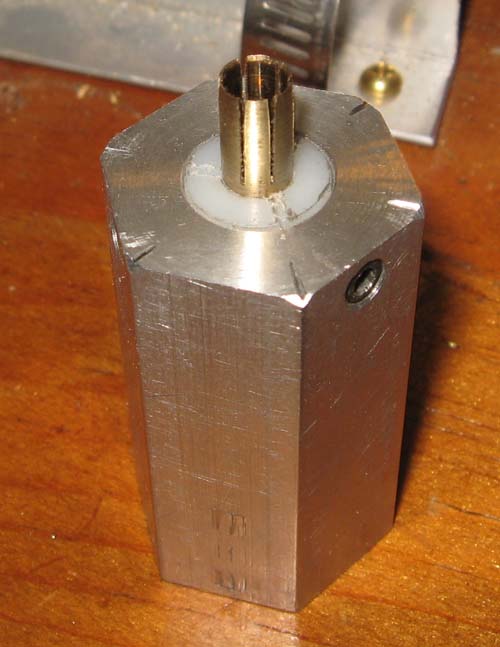
Above is a slit ferrule. After slitting there will be a burr at the end of each slit. This is easily removed by twisting a drill the I.D. of the ferrule in it. The fixture is very handy to hold the ferrule to crown it.
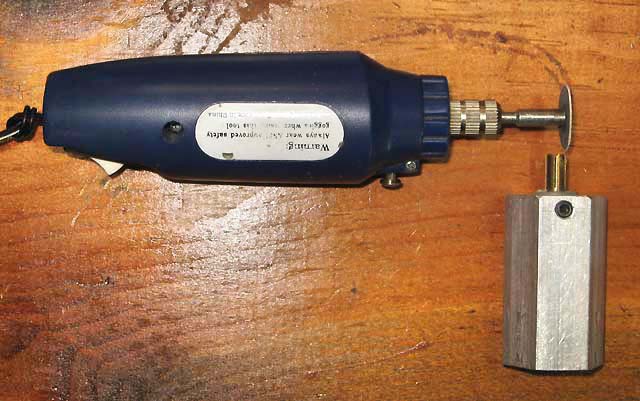
I do the crowning free-hand with a small rotary tool that fits the palm of my hand nicely. The cutting is done with a 220 grit sanding disk. The advantage of the sanding disk is that it cuts only on one side at a time. One doesn't have to worry about what is happening to the adjacent tab while working on one. Also the disk won't fly to bits if it gets chipped like the ceramic disks do. Here is finished ferrule
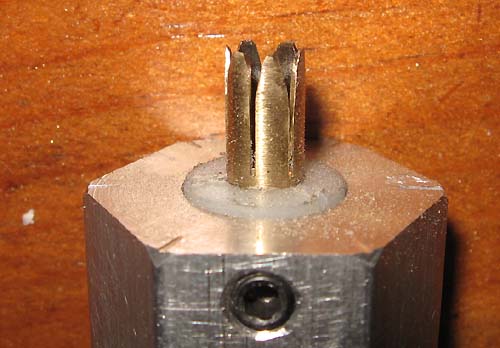
Sources of materials and tools
The two rotary tools shown were from Harbor Freight. The the big one has is at this link. It's often on sale to about $20. The design has changed since this was written, so the mounting arrangement may need to be different. The small one is at this link. I have seen it on sale as low as $7. With the sanding disk it's also very handy for debarbing hooks. The saw blade is from Gyros, see this link. It was available in a local hardware store. The nylon and the hex stock came from McMaster-Carr . Here's a link to the hex stock, and a link to the nylon. The nylon turned out to be slightly oversize and had to be lightly turned to fit the 1/2' hole bored in the hex stock. The machining required to make this setup is well within the capabilities of a small metal lathe.